It is our last pregnancy and there is just no time.
No time for belly photos.
No time to lie on the couch together, with your hand on my bump as the little one kicks away.
No time to play remember when or can you imagine.
No time to shop.
No time to talk about what we might need.
No time to discuss labour or getting through the weeks that follow.
No time for me to say thank you.
Thank you for giving me my babies, for putting my dreams before your own and for filling me with a joy and a richness that exceeds any words that I have.
In the years to come I suspect we will continue to have no time and I think we can handle it, as long as there is love and we both know what we mean to each other. I think, with or without time on our side, we will be fine.
Please take this moment to read my words, to hear my gratitude and to know that I am sorry that there is just no time.
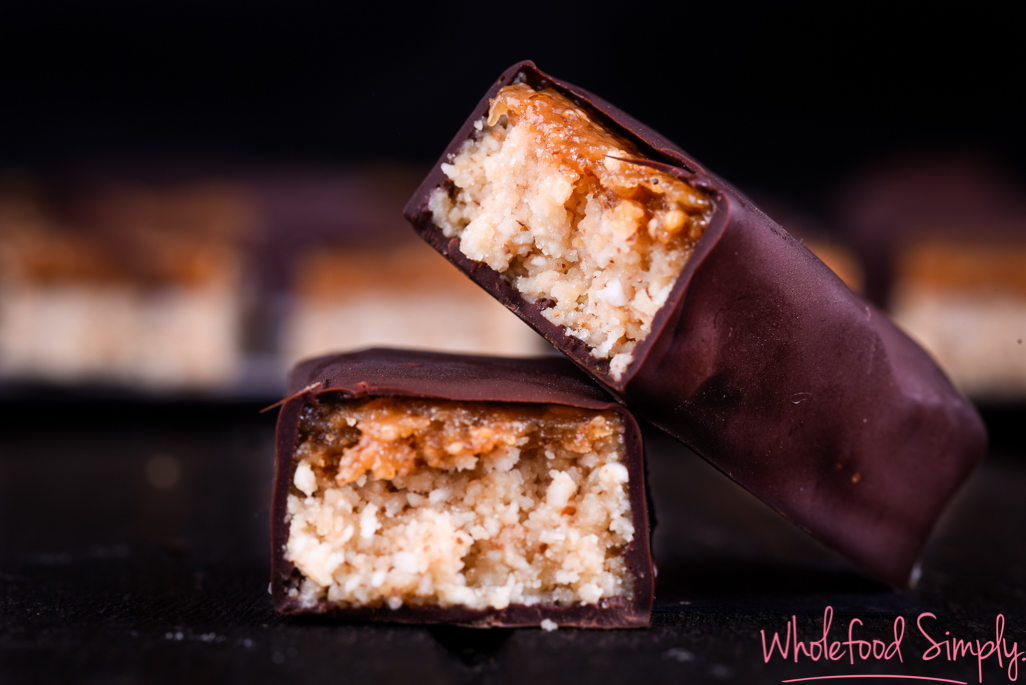
Not Quite a Twix Bars
base
- 1 cup almond meal
- 1 cup desiccated coconut
- 2 rounded tablespoons almond butter
- 1 tablespoon maple syrup
- 1 rounded tablespoon coconut oil
- pinch of salt
the topping
- 4 tablespoons almond butter
- 3 tablespoons maple syrup
- 1 tablespoon coconut oil
optional extras
- 50 grams dark chocolate, melted (if choosing to simply top the slice with chocolate prior to cutting. I have made this recipe many times now and this is my preferred method)
or - 200 grams dark chocolate, melted (if choosing to coat each bar with chocolate)*
- Line a tin with baking paper over hanging the sides. I have made this in a loaf tin measuring 19.5cm x 9.5cm and a 20cm square tin.
- Starting with the base, place the almond meal and coconut into a medium sized bowl. Place the almond butter, syrup and oil in a heat proof bowl and gently heat to soften the oil. Once the oil and almond butter are softened stir the mixture until it is smooth. Add the wet mixture to the dry mixture and mix to combine. Use your hands to work the mixture until it is well combined and sticking together. Press the mixture very firmly into the base of your prepared tin. Set the base aside or place it in the fridge while you make the topping.
- Place the topping ingredients into a heat proof bowl and gently heat until the oil is softened. Stir the topping ingredients together until the mixture is smooth. Pour the topping mixture over your base and place in the fridge to set.
- If desired, top the slice with the melted chocolate once it has set.
- Eat and enjoy!
*to dip the twix bars in melted chocolate place the slice into the freezer after step 3 and leave to set for one hour before cutting the slice into bars. Return the bars to the freezer while you melt the chocolate. Working quickly, dip each bar into the melted chocolate and return them to the fridge to set.
notes – you can also make this in a processor if preferred.

